This song is dedicated to all farmers who have successfully tried the System of RIce Intensification (SRI) and are now trying to convert their neighbors to the method. Sing to the tune of “Magtanim Ay Di Biro”.
Awit ng SRI-Pilipinas
isinulat ni Roberto Verzola (sa himig ng Magtanim Ay Di Biro)
Refrain:
Halina, halina, mga kaliyag,
tayo’y magsipag-palay lahat.
Magbago tayo ng kaisipan;
S-Rr-I ang subukan. (Ending: S-Rr-I Pilipinas)
Contra-refrain: (kasabay ng Refrain)
Sa organic SRI, kalusuga’y gaganda;
gastos ay bababa, kabuha-ya’y sasagana.
Sa ingles, “system of rice intensification” sya;
tawaging Sipag-Palay sa mga magsasaka.
I.
Magtanim ay masaya,
maghapong kumakanta.
Uupo kung pagod na;
tatayo kung puwede pa.
II.
Inaamag na ka-nin,
sa pulot patatamisin.
Pitong araw ang hintayin,
I.M.O. ay gagawin.
Refrain/Contra-refrain
III.
Ang dayami’y ipunin,
sa I.M.O. ay diligin.
‘Sang buwan lang na bulukin,
isabog na sa bukirin.
IV.
Gawin mong uling ang ipa,
sa kama’y pampataba.
Sampung kilo’y ipunla,
isang ektarya kasya na.
Refrain/Contra-refrain
V.
Sampung araw na idad,
punla ay ililipat.
Puno ay isa-isa;
layo’y sampung pulgada
VI.
Ang tanim huwag ibabad;
mabubulok ang ugat.
Tatlong araw basain;
isang linggong patuyuin.
Refrain/Contra-refrain
VII.
Sa tuwing sampung araw,
weeder ipambubungkal.
Ang damo’y matatanggal;
ang ugat, mahahanginan.
VIII.
Gawa natin ay may saysay,
Kung suwi’y kumakapal.
Kung ito’y doble bilang,
Puwede nang ipagyabang!
Refrain/Contra-refrain
IX.
Kung namumulaklak na,
tubig papasukin na.
Saya natin ay ikanta;
asahang ani’y maganda.
X.
Kung SRI kabisado na,
tanim gawing iba-iba.
Palay, gulay, puno pa,
Pagkain at pambenta.
It is an interesting phenomenon and an eye-opener for me.
Out of the 6,000-plus who accessed this blog over the twelve months since I started it, the most popular posts have been Bahay Kubo (and other English translations of Filipino folk songs), in a near dead-heat with the origami CD envelope I designed myself. (For comparison, the video instructions for the origami CD envelope I posted on YouTube eleven months ago has logged more than 20,000 accesses.)
What is interesting is that folk song accesses seem to come in waves — a steady 3-5 accesses a day, then every two weeks or so, I’d see 15-20 folk song accesses on a single day. Often it is Bahay Kubo, but sometimes, Sitsiritsit alibangbang, Paru-parong bukid or Leron, Leron sinta.
I am imagining that an elementary class somewhere in the Philippines is given an assignment to translate a folk song into English, and the students go in groups to a nearby Internet cafe, to search the Web for a translation. They find my site, and their work is done.
Hopefully, they’d realize that it would be easy for their teacher to notice that the translations look alike, so they’d each try to make some major or minor changes here and there, exercising further their skills in English, rhyme, rhythm and thinking.
I’ve gotten some encouraging comments about my English translations of Filipino folk songs. This is probably because my translations can be sung with the original tunes. So far, I’ve done four: Bahay kubo, Paru-parong bukid, Leron Leron sinta, and Sitsiritsit alibangbang. I think my most appreciative audience is elementary school students, who have to do their homework.
If you want your favorite folk song translated, please email me the lyrics (rverzola@gn.apc.org). If it’s a song I like, perhaps I’ll translate it sometime.
No, that’s not a kind of snake. Python is a programming language.
I don’t do too much programming nowadays, but when I do, Python is my programming language of choice.
I like Python for several reasons:
It is object-oriented, which means you can work with an abstract data type that combines data and methods in a single object. Objects foster reusability.
It has built in code testing facilities, which makes catching new errors easier when you modify code
Because it uses words instead of cryptic symbols, it is essentially self-documenting. Code that I wrote several months ago still make sense when I read them today.
By using indentation as part of the language to indicate program structure, it cleans up the code significantly. There is no need for curly braces or keywords like end, endif, endwhile, and other clutter.
Python has very good facilities for lists, tables, arrays, dictionaries, file I/O and other data structures, which can be combined to create more complex objects.
I probably could have used Ruby as well, but Python seemed to suit me better.
I used Python to implement the online SMS-based reporting system Halalang Marangal used in the 2007 national elections. The system was implemented in Linux/GNU with MySQL and a small but very fast Web server called FAPWS (fast asynchronous python web server), which was also written in Python. Gnokii took care of the cellphone/SMS interface. Python made it easy to put the different systems together. The whole thing was easy to maintain and quite fast too.
According to the book Human Scale by Kirkpatrick Sale, the most efficient form of transportation on earth is the bicycle. In terms of converting energy to motion, the book says, the bicycle is more efficient than a horse, fish, bird, mouse, car, helicopter, plane, jet, or any other animal or machine.
Given the increasing cost of gasoline, diesel, LPG, and other fossil fuels, we have all the more reason to shift to bicycles for ordinary, day-to-day transport. We should all ask our local officials to set aside road lanes specifically for bicycles, to encourage everyone to use this super-efficient transport mode for daily commuting or just for leisure.
Bicycles do not only save the rider money and the country dollars. They also reduce pollution and greenhouse gas emissions. In addition, bicycle assembly, manufacture and repair can become a backyard industry. Best of all, a bicycle keeps the rider fit and healthy.
If you (or your children) don’t know yet how to ride a bike, here’s a painless way to learn, minus the usual bruises:
Get a bicycle of the right training height for you: that is, when you sit on the saddle, your heels should barely touch the ground.
Unscrew the two pedals and take them out, so that your feet can easily move back and forth without obstruction.
Find a level or very slightly inclined road with no motorized traffic that can disturb your riding practice.
Practice pushing yourself off with your feet, lifting your feet off the ground for as long as you can, and then extending your feet to stop your fall.
Try to stay in balance on the bike for as long as possible. One way to stay in balance is to steer the bike in the direction of your fall. You must learn to do this without conscious thought.
Keep practising, until you are confident you can keep your balance as long as possible on a slow-moving bike. Get someone to push you off, for greater momentum.
When you can keep your balance without conscious thought, practice how to make turns. Turning essentially involves leaning towards the direction of your turn. Again, practice until you can turn without conscious thought.
When you can make turns with confidence, install back the two pedals and learn to use them. You may now start enjoying your new-found riding skill!
For a video showing how to fold letter-size or A4 paper into a sturdy CD/DVD envelop that protects its contents well, check the site below. The video shows the same method described on this blog.
If you use one-half or one-fourth of the paper, the result is perfect for seed packets. If you fold the paper along instead of across the length, you’ll get a nice envelope for letters (or money).
[Note: I have posted in YouTube, here, a step-by-step video of the folding instructions. Or you can just click on the video below.]
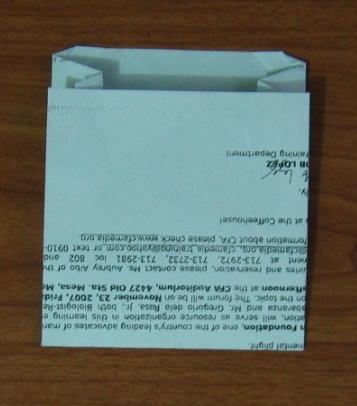
I have been looking for a good CD envelope made with paper-folding techniques, but have found nothing satisfactory. The envelopes either unraveled at a slight tug, used unnecessary aids like Scotch tape or left the CD exposed). So I decided to design my own. I wanted something that does not unravel easily, is sturdy purely from folding, and protects the CD/DVD inside fully. What follows is the result of weeks of trying various designs. I think this is the best origami CD/DVD envelope in the world. (November 4, 2007)
Start with 8.5”x11” or A4-sized paper. If you are recycling paper, use the blank side for the inner side, to minimize ink contamination inside the envelop.
Fold the paper across the length into two, one part about an inch shorter than the other, so that a CD/DVD fits completely inside the fold, and the longer half provides about an inch of cover flap. We will call the crease formed by this fold the bottom crease. (See a different set of photos at the pages section.)
Position the folded paper with the shorter front half facing you and the cover flap on top. We will call this orientation the standard position.
Imagine two short 45-degree diagonals starting from the upper corners of the front half, and going down towards its center. On the cover flap, take each upper corner of the flap and fold it inward (forming a valley crease) diagonally, aligning the side of the cover flap with the imaginary diagonal and creating an acute triangle that points towards the center and somewhat upwards. Do not crease along the entire fold. Just pinch a short crease where the fold meets the side of the paper. The final angle of these creases will be adjusted in Step 15.
Steps 5-7 will center the front square. Pull the upper right corner of the front face down diagonally, aligning the horizontal side of the triangle formed with the bottom edge. Don’t make a diagonal crease; just note where the corner touches the bottom edge — call it Point X.
At the midpoint between Point X and the lower left corner, make a short vertical inward (valley-forming) crease extending from the bottom edge to about half way up.
Repeat for the upper left corner: pull it down diagonally, aligning the triangle with the bottom edge. Note where the corner touches the bottom edge. Midway between this point and the lower right corner, make a vertical inward crease extending to about halfway up.
Unfold everything, then fold along the two side creases, in the same inward folding direction as the bottom crease and parallel to the length of the paper, marking the sideflaps.
On each folded sideflap, imagine a line along the length, parallel to the side crease, about one-third of the width from the paper’s edge. Make a smaller inward fold along this line, splitting the sideflap into two: a smaller portion that is half the width of the wider portion, the paper’s edge appearing to divide the wider portion into two. Keep the edges parallel. We will refer to the two new creases formed as the pocket creases.
Each pocket crease ends in two corners. One corner is nearer to, the other farther away from, the bottom crease. Take the nearer corner and, keeping the pockets folded, fold (valley-forming) the end of the sideflap diagonally, forming a small triangle. Make sure the side of the triangle is aligned with the side crease. Repeat for the other sideflap.
Unfold along the side creases, keeping the pockets folded. Refold along the bottom crease.
Position the paper with the shorter half facing you and the cover flap on top (standard position). The diagonal folds at the upper corners of the front half should be visible.
Take each upper corner of the back face and fold it diagonally inwards along the diagonal of the small triangle, covering the small triangle with a bigger triangle similarly aligned and aligning the horizontal side crease with the upper edge of the front face.
Unfold the small and big triangles. Keeping the bottom crease folded, unfold just the upper portion of the pocket creases on the back face, revealing the full length of the cover flap. On the top edge of the cover flap, note the three pairs of creases: the pocket crease, the side crease (point B), and the diagonal crease (point C).
Note also the short creases on each side of the cover flap, made in Step 4. Make a diagonal inward fold along this crease, slightly adjusting if necessary the angle of the diagonal so that it ends midway between points B and C, creating an acute triangle pointing slightly upwards and towards the center. Reinforce the pocket crease over the acute triangle, unfold the acute triangle, and refold the pocket crease. Repeat for the other corner.
Keeping the pockets folded, refold the bottom crease, the shorter half facing you and the cover flap on top (standard position).
Take each bottom corner and make a small inward diagonal fold, making sure the vertical edge of the triangle formed is aligned with the side crease.
Fold the front sideflaps outward (hill-forming) along the existing side creases, hiding them behind the square front face and exposing the back sideflaps.
Fold the back sideflaps inwards, along the existing side creases, and tuck each back sideflap into the pocket (hidden) of the front sideflap. It is better to reinforce the existing creases first, before doing this.
On each sideflap, press the pocket crease with \your forefinger from the outside and your thumb from the inside, flattening the sideflap. Refold the acute triangle on the sideflap. This will in effect sandwich the top edge of the front sideflap between the acute triangle and the back sideflap, locking it in. Refold the sideflaps back into a flat envelop. Note the zigzag pattern on the cover flap. Repeat for the other sideflap.
Orient the envelop with a side edge facing you. Insert four fingers of one hand into the envelop between the back face and the sideflap. With the thumb, press the side edges together from the outside to flatten the side crease on the back face. On the cover flap, note the 45-degree diagonal crease, which actually extends (though hidden) into the sideflap inside the envelop. Refold along this crease then flatten back the envelop, reinforcing the creases hidden inside. Repeat for the other sideflap.
You can insert up to two CD/DVDs into this envelop, using the sideflaps as divider.